Starting a Sequence
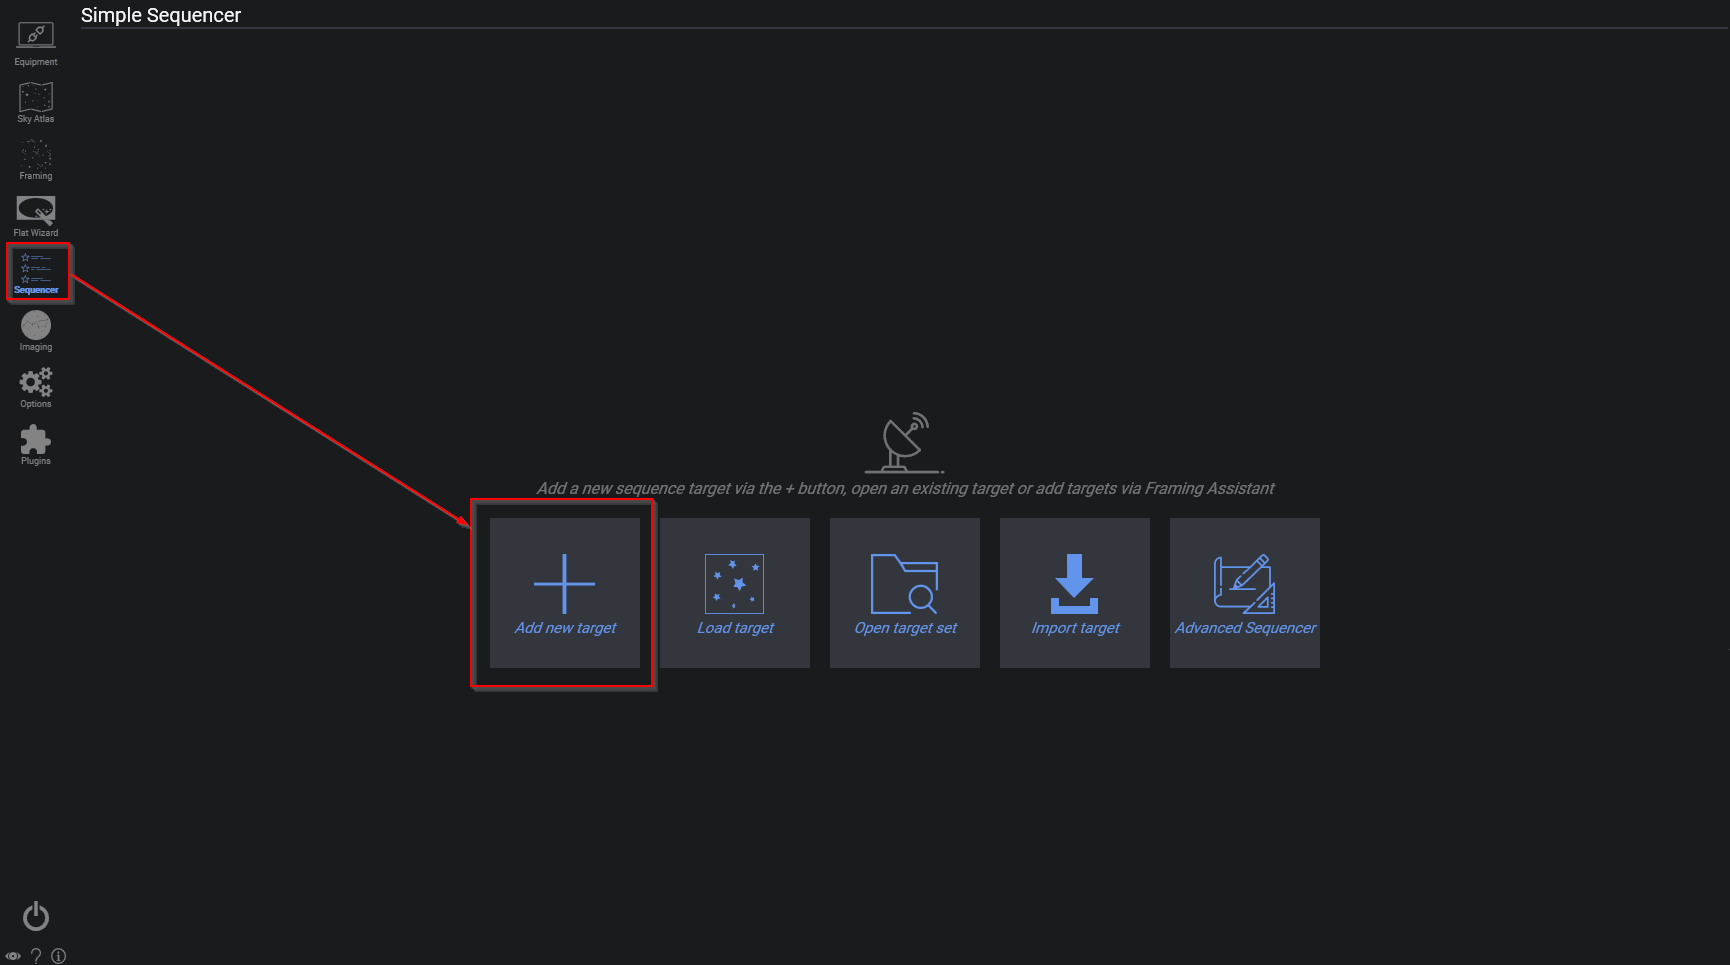
Once you nailed your focus you can switch to the Sequence tab. There you should create a new target.
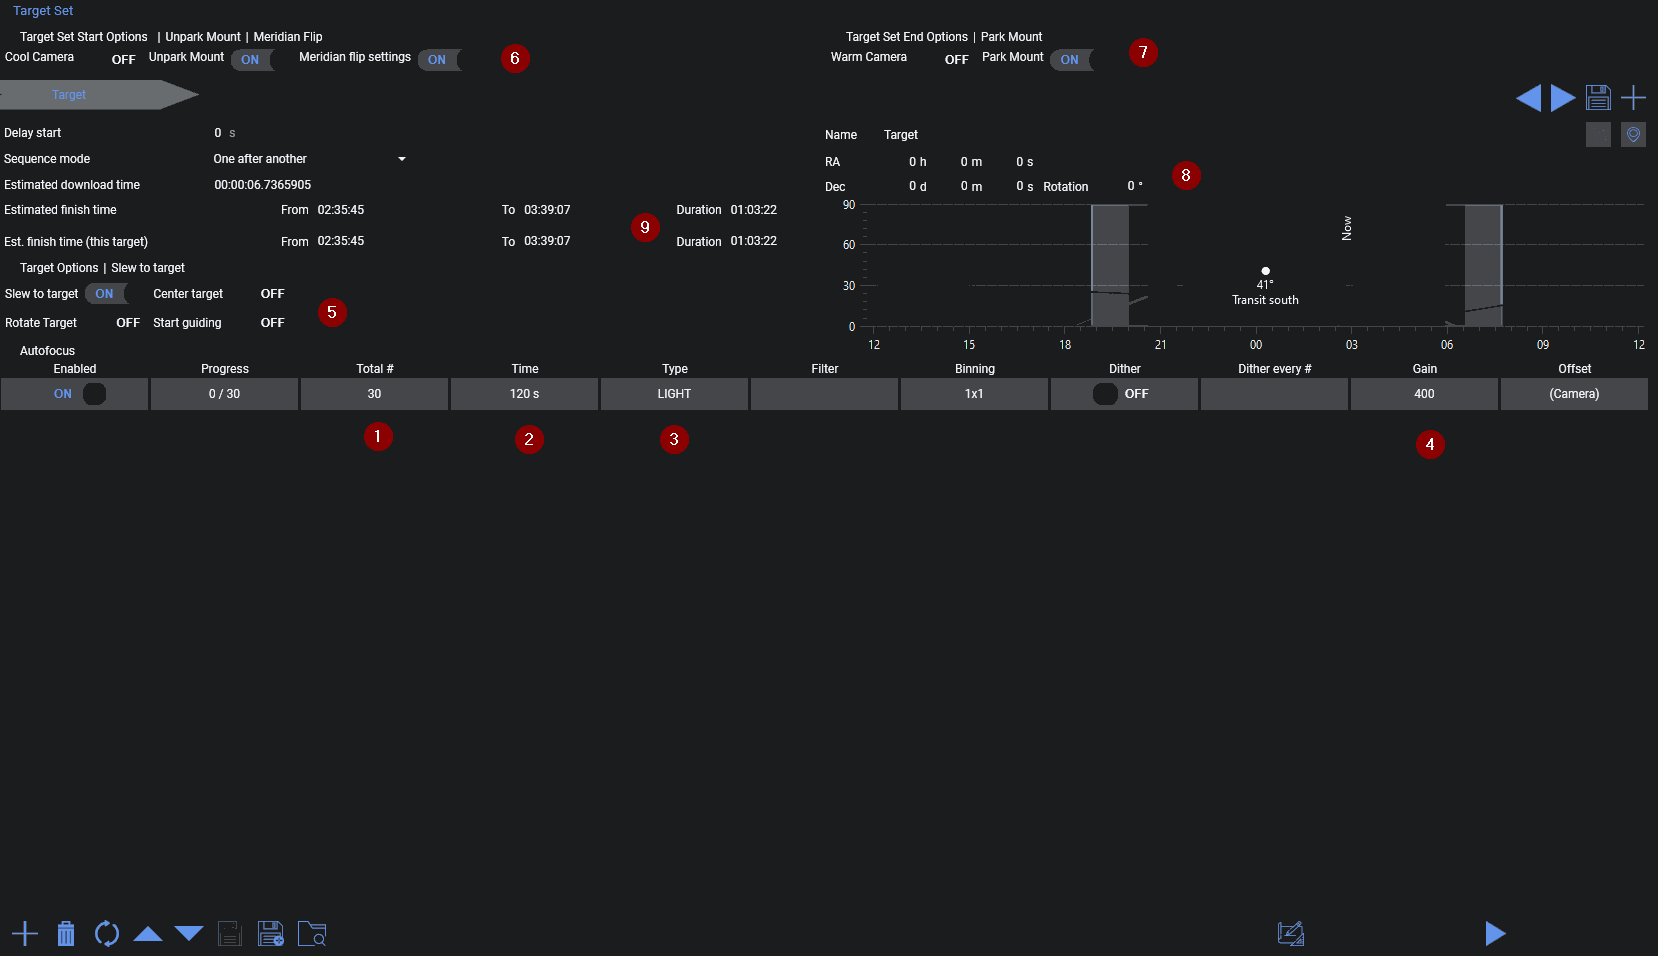
Here we can find various options. For One-Shot-Color users it's a relatively simple matter. Enter the amount of images you want to shoot in Total # (1), enter the time for a single image (2) and the type (3), which likely will be LIGHT at that point. You may also want to change your gain for the sequence in the gain column (4).
Now open up the Target Options (5) and enable "Slew to Target" so that your mount will slew to the specified target. In addition enable to unpark the mount and to enable the meridian flip in (6). To also park the mount after everything is done, enable the Park Mount option in (7).
Now for the slew to actually slew to a specific target, enter the coordinates and name in (8).
You can see an estimation when the sequence is likely going to end (9). This value will change during the sequence depending on the average download time of your camera.
Finally press Start Sequence at the bottom right to start the imaging sequence.
Now that your sequence is running, head back to the imaging tab on the left side bar.
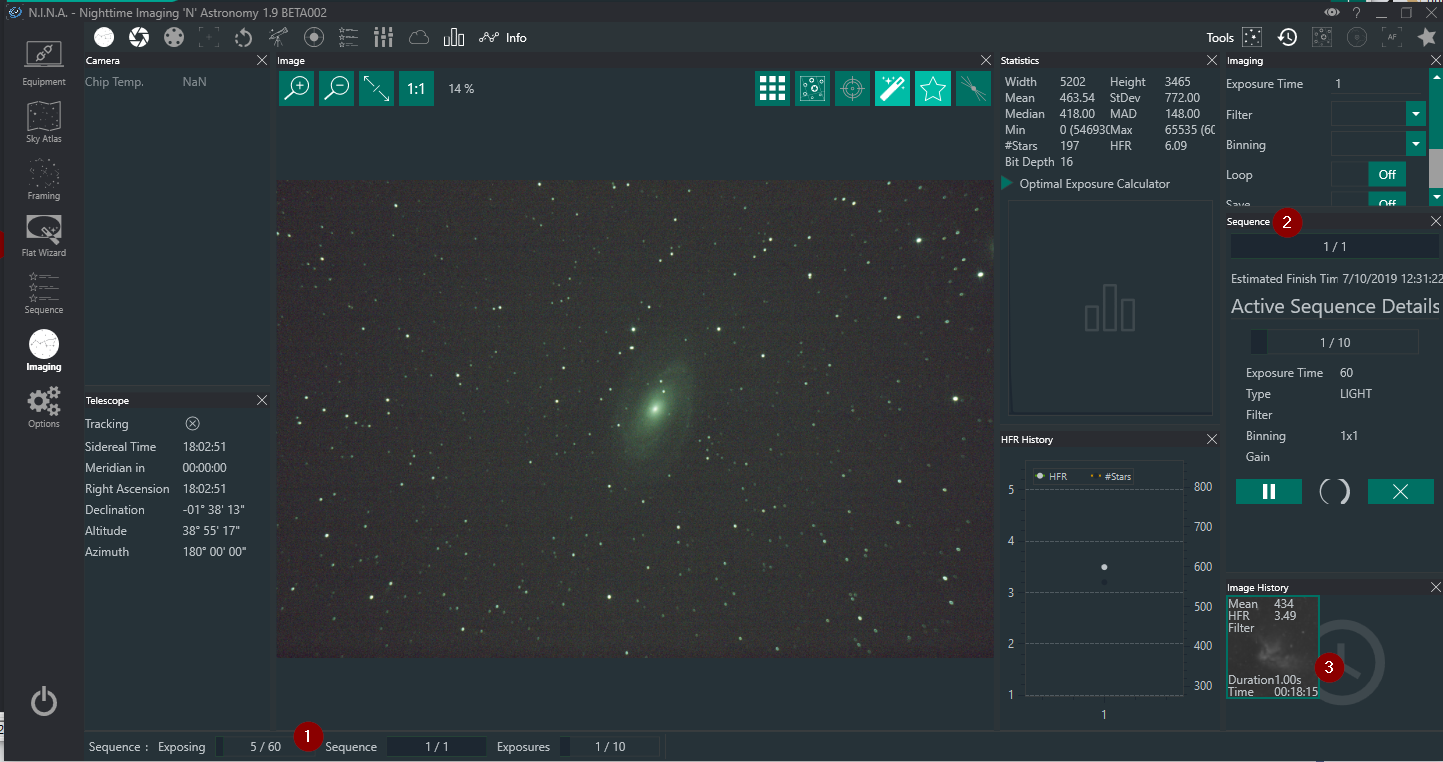
Here you will see some small changes about the status of the sequence. At the bottom left (1) you see the current status of the camera which will change depending on what it is doing. In the sequence tab (2) you will see the estimated finish time and information about the image that is getting shot currently. You can also cancel the sequence prematurely using the button at the bottom of the sequence tab. Finally in the Image History (3) you will see the past images you shot and you can open them from there to review them. From here on it's waiting until the sequence completes.
Good luck and clear skies!
For more in-depth information about sequencing head to the Sequence Overview