iOptron Mount Setup
These notes are intended to be a quick reference to the usage of iOptron mount and N.I.N.A. for DSO imaging.
This guide is based on iOptron ASCOM Commander v 3.73
Set up your iOptron mount#
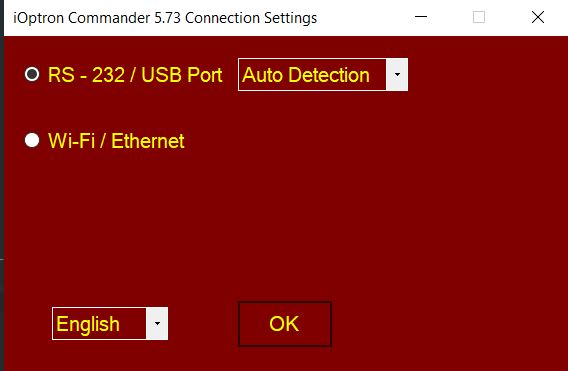
To connect your mount first make sure the mount is powered and properly connected to your PC (refer to iOptron manual), then open iOptron Commander app and click on connect mount.
Once the mount is connected, open Mount Panel.
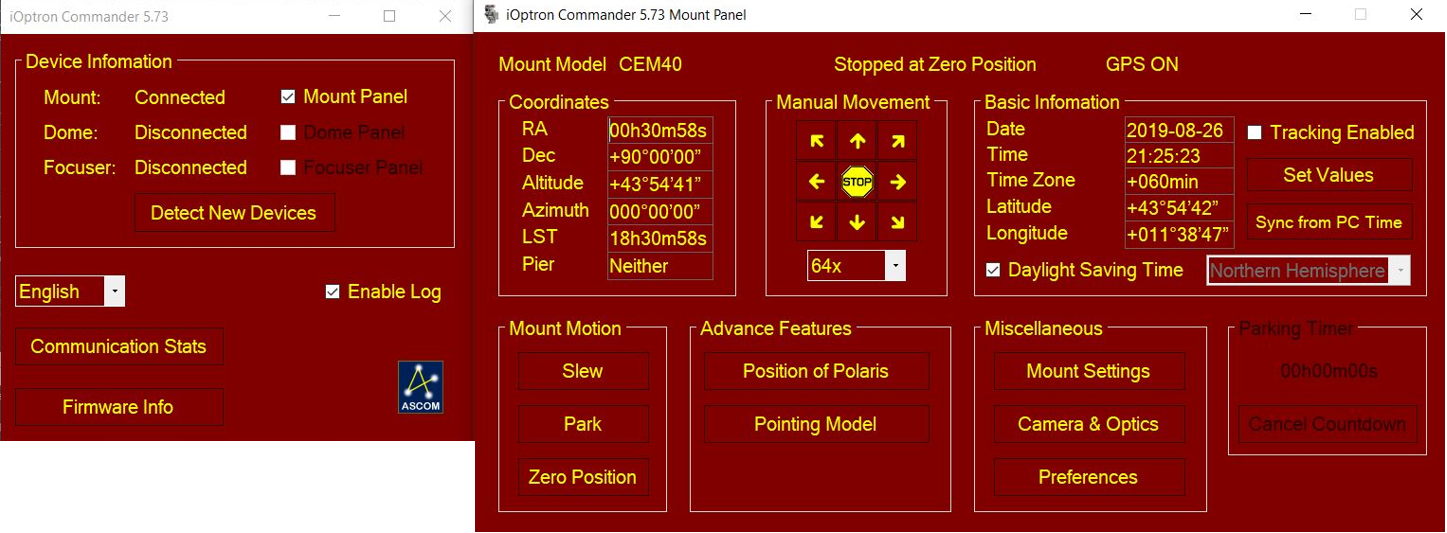
Here you want to define a couple of parameters under Preferences tab (please note all these parameters can be configured from the handset as well):
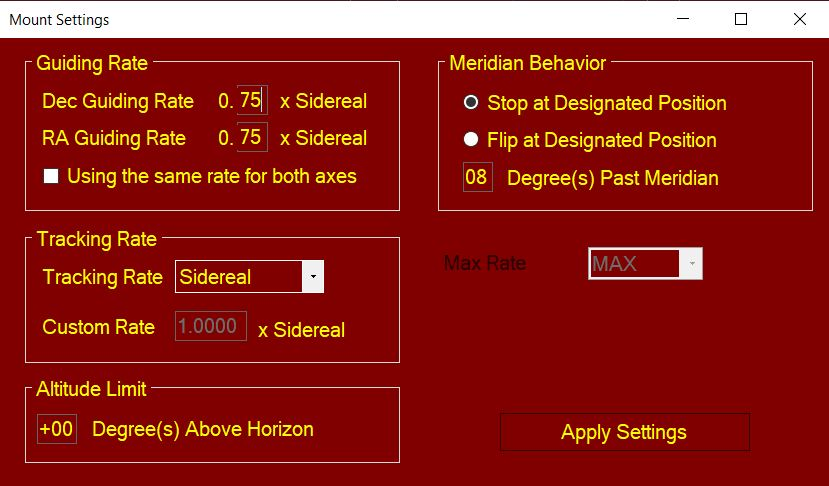
- Tracking rate: set to Sidereal for DSO imaging
- Guiding rate: this is the speed used for guiding pulses (e.g. from PHD2). Typical values are 0.50x to 0.75x sidereal, experiment to find the best value for your setup. Usually you want RA and DEC to have the same guiding speed (tip: remember to re-calibrate PHD2 if you change this parameter).
- Meridian Behavior: this defines what the mount will do when passing the meridian. Since you want N.I.N.A. to manage a meridian flip, do not select “Flip at Designed Position”. The alternative “Stop ad Designed Position” will stop the mount tracking after meridian is passed according to the value set in “Degree(s) Past Meridian”. This is a safety measure to prevent the mount/OTA from crushing into the tripod/pier. Consult your iOptron mount manual to check how many degrees it can track past meridian. Typical values are from 10 to 15 degrees, equal to 40-60min after meridian passing (remember at Sidereal rate 1°= 4min). Set a value you are comfortable with from 0° to the max of your mount’s limit. Note: remember this value as this may affect your Meridian Flip settings in N.I.N.A., see section 2
Click “Apply Settings” and close
Configure N.I.N.A.#
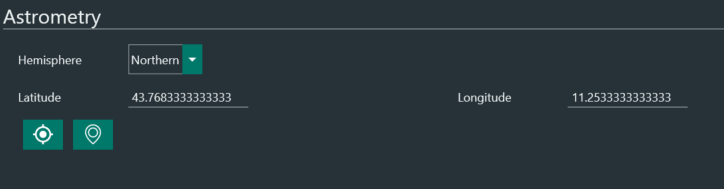
a) Launch N.I.N.A., Epoch to JNOW is automatically detected. Set hemisphere, Lat and Long according to your location (when you connect the mount, N.I.N.A. will ask you if you want to sync Lat and Long from the mount if it has an integrated GPS)
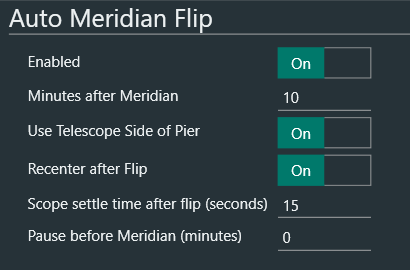
b) In Options>Imaging>Auto Meridian Flip you can define the mount behavior at meridian passing. Please refer to N.I.N.A. documentation here for a detailed description of each parameter.
- Set Enable to “On”, this will enable Auto Meridian Flip
- Minutes after meridian defines how many minutes to wait after meridian is passed before N.I.N.A. will initiate the Flip sequence
- Set Use Telescope Side of Pier to “On”
- Set Recenter after Flip to “On”. This will platesolve and accurately recenter the scope to the target after the flip
- Scope Settle Time after flip (seconds): set a value from 15 to 30 sec
- Pause before meridian (minutes): if this is set to any n value >0 N.I.N.A. will stop the mount tracking n minutes before meridian passing. Usually you want this enabled when you need time to perform some tasks at the mount before the meridian flip, for example if you need to adjust cabling to prevent them from snagging. If your mount can pass meridian with no problem, then leave it to 0.
Notice
When Pause Before Meridian is set to “0” the mount will keep tracking past meridian until the Minutes after meridian is reached. Make sure that the time you set in Minutes after meridian is shorter than what you set in iOptron Commander, otherwise your mount will stop before N.I.N.A. can perform the flip. For example, if you set 2 degrees (8 min) in iOptron Commander and 15 minutes in Minutes after meridian in N.I.N.A., iOptron Commander will stop the mount 8 minutes after meridian is passed and N.I.N.A. will not be able to perform the flip procedure.
c) Under Equipment>Telescope select iOptron ASCOM Driver for Mount, click on the connect symbol and enjoy our imaging session!
