Finalizing Settings
This whole setup routine only has to be done once for a specific profile. Once you have your default mount and camera set up you just need to press the connect button on the lower left after N.I.N.A. is started up to connect to the saved equipment automatically.
We have a few small steps to do before we can start with imaging. For that we need to switch to the options tab.
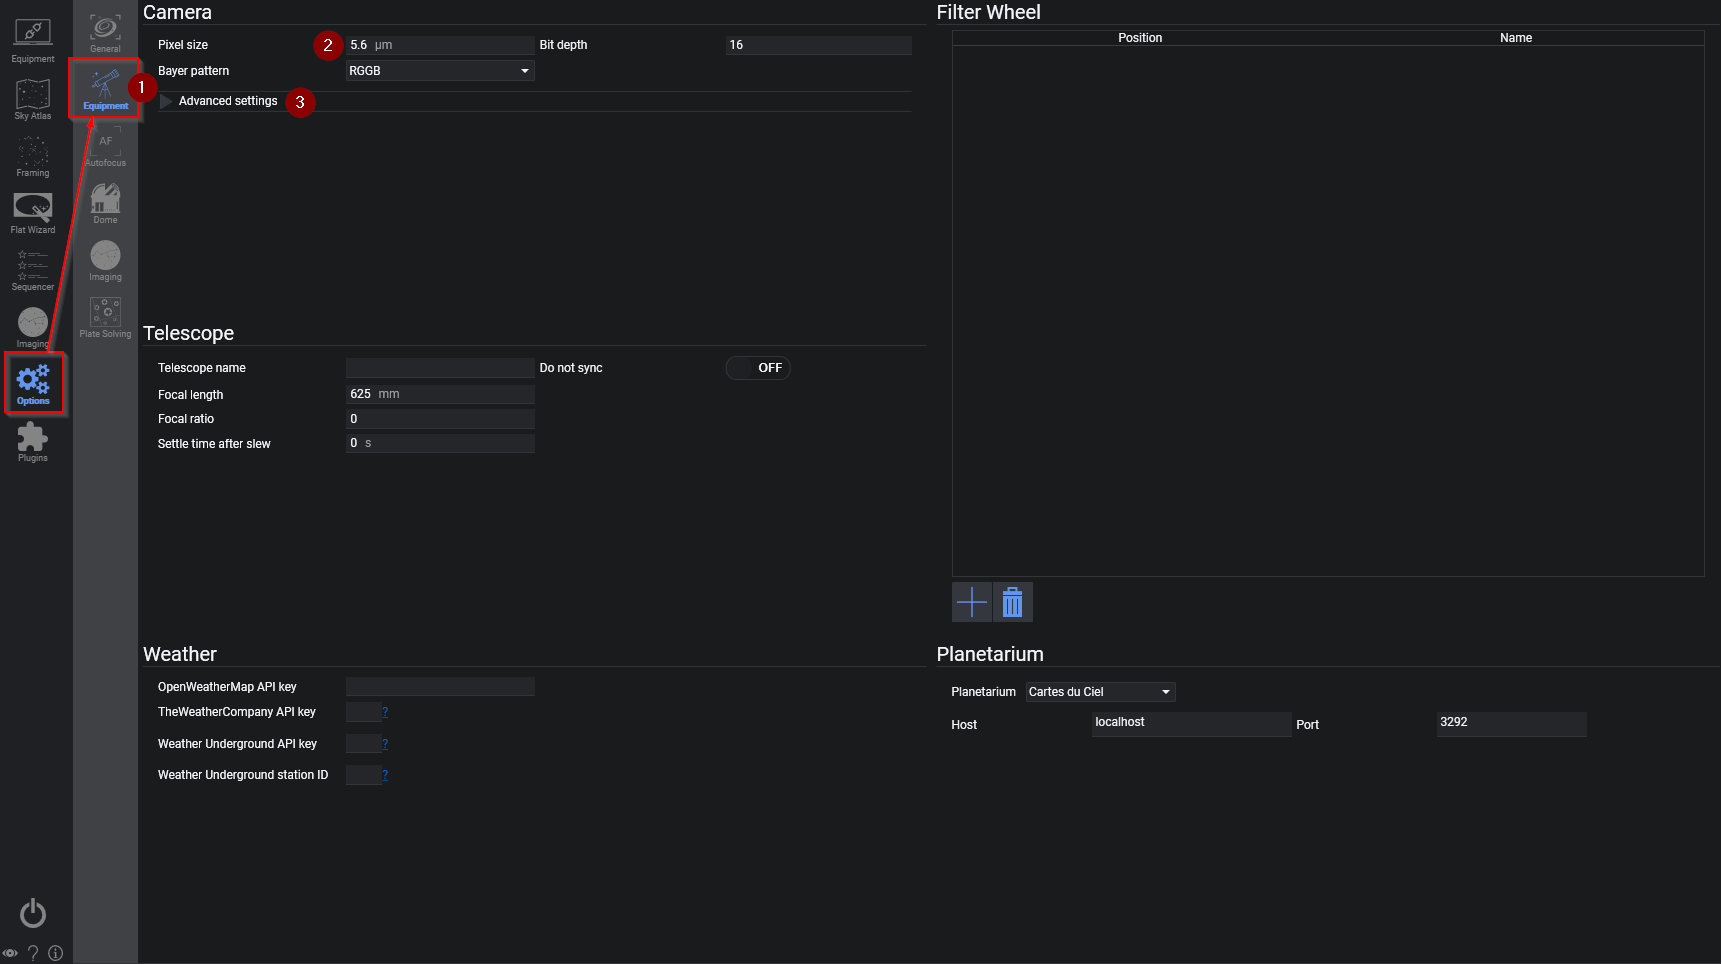
In the options we go directly to the Equipment tab (1) and have to set a few things first. You should set your pixel size to the pixel size that your camera has, if it has not been set automatically, which is the case with most DSLR and some ASCOM drivers. Search online for the pixel size of your camera and enter the value in (2).
Bit depth will be kept at 16 bit for most cameras, as this does not refer to the sensor bit depth but at the actual raw data depth that the camera driver produces. Most drivers will scale this automatically to be 16 bit. In case you are using a DSLR and have the raw converter selected to be "FreeImage" (in the advanced settings) then you need to enter the real bit depth of your camera instead!
Tip
If you have an older Nikon camera you might not be able to use the native bulb mode, controlled via USB, for exposures that are longer than 30 second. If you have a RS232 (serial) shutter cable or your mount has a camera shutter control port, change the Bulb Mode inside the advanced settings (3). Please refer to the Advanced topic using RS232 or mount for bulb shutter.
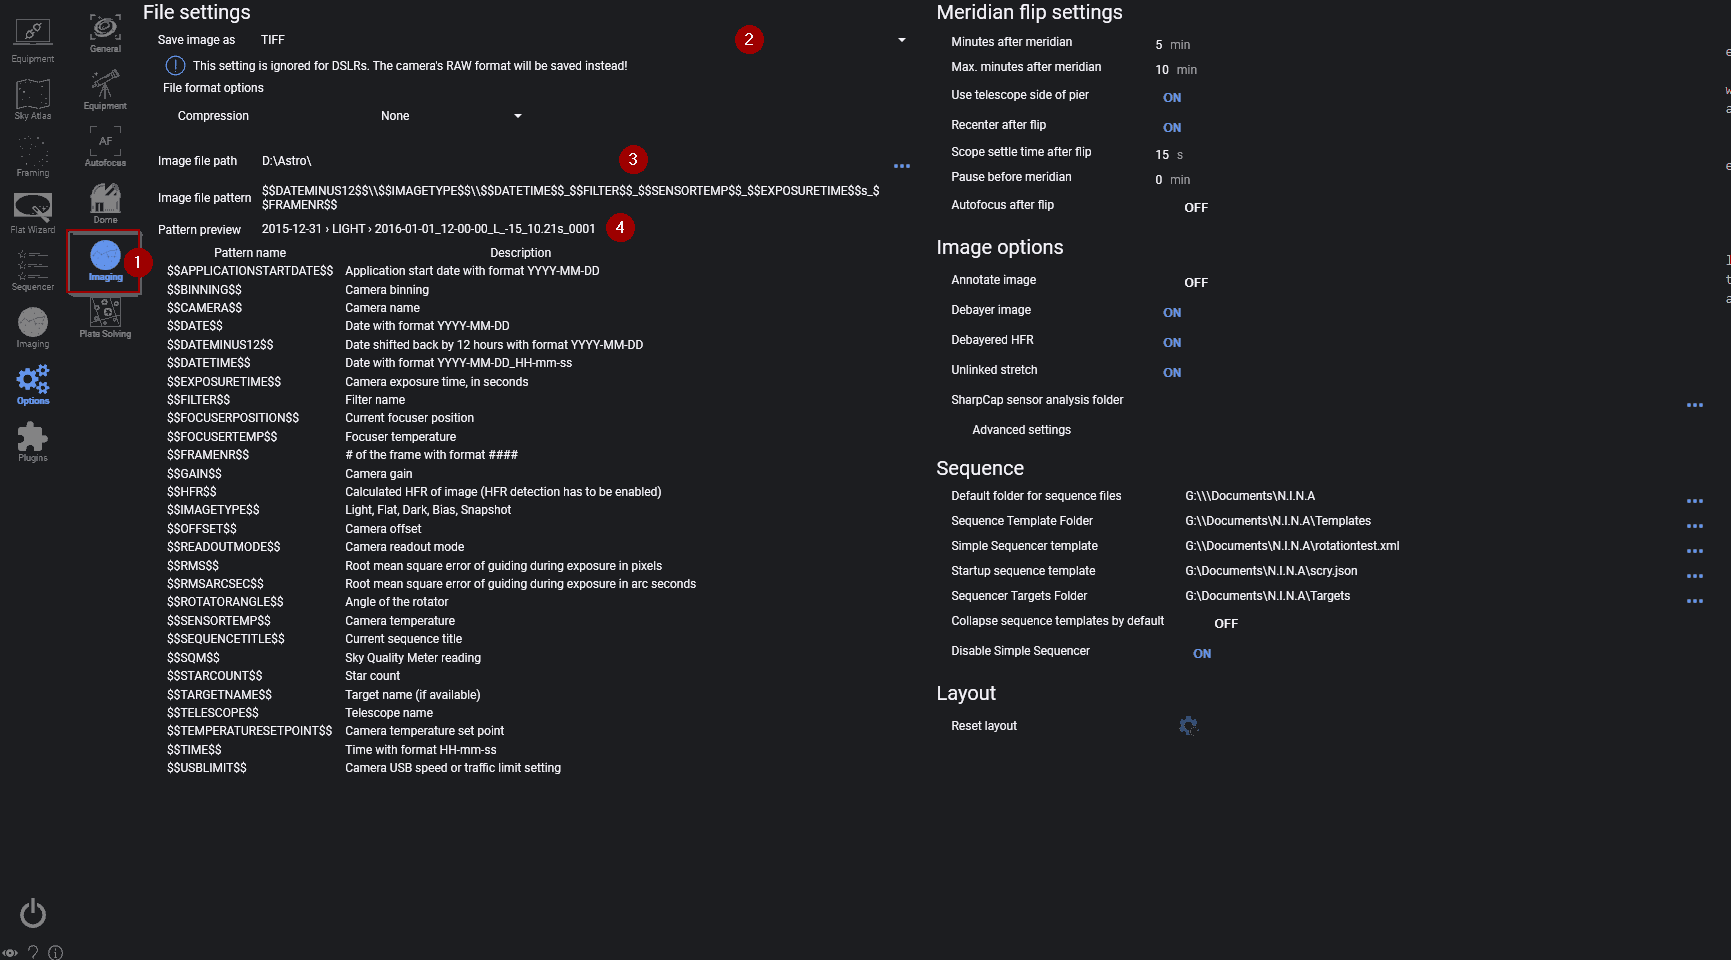
Now we have to set a few other image saving related settings as well. To do that switch to the Imaging tab (1). The images can be saved as TIFF (with two different compression algorithms, too), XISF and FITS (2). FITS is a solid format that can be read by all astronomy related software and this setting can be left unchanged. Feel free to change it though should you prefer a different format.
Next you need to set the Image File path (3). This is the place where your images will be saved. And finally, if you want you can change the Image File Pattern (4). This is how the images will be named after. You can see variables that you can use below the panel and below the pattern you can check how your file pattern will look like. You can leave this setting on default or customize it as you like.
Once you have done that we can move on to to focusing and starting a sequence.